
This is a comprehensive tutorial on “WordPress backup,” where I will demonstrate various website backup methods.
Many WordPress websites often encounter issues such as theme or plugin conflicts during updates, or the closure of the WordPress hosting company, resulting in the loss of website data.
Or the website is attacked, causing data damage, requiring a complete restart…
These situations are undesirable for website owners and highlight the benefits of regular website backups. In this article, I will demonstrate multiple “WordPress backup” methods and explain how to restore a website, hoping to effectively assist you.
What are the methods for backing up a WordPress website?
There are three main methods for backing up a WordPress website: using a plugin, manually backing up with phpMyAdmin + FTP, and automatic backup by the host.
- Using a plugin: This is the method we recommend most, as it does not require understanding the underlying operations—simply click a button to fully back up the website.
- Manual backup with phpMyAdmin + FTP: Some backup plugins may have backup capacity limits (requiring a paid upgrade), but if budget is a concern or you want to retain control over the original WordPress data, this can be a good option.
- Hosting provider automatic backups: The best WordPress hosting providers typically offer daily automatic backups. If you need to restore your site, simply go to the backend and click the restore option.
Next, I will demonstrate how to perform WordPress backups using these three methods, including website restoration.
Method 1:UpdraftPlus Backup + Restore Website

UpdraftPlus is a popular WordPress backup plugin with over 3 million downloads and nearly perfect ratings.
With UpdraftPlus, you can perform manual backups, scheduled automatic backups, back up your website to your local machine, back up your website to the cloud (such as Google Drive, Dropbox, Amazon S3, FTP tools, etc.), restore themes/plugins/uploaded content individually, and migrate your website.
Before starting the website backup process, please first install and activate the UpdraftPlus plugin.
Back up your website using UpdraftPlus
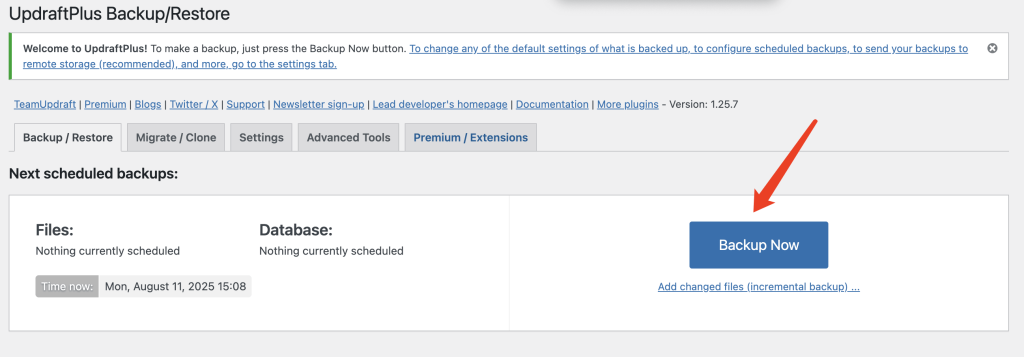
First, go to WordPress Settings > UpdraftPlus Backup and click Back Up Now.
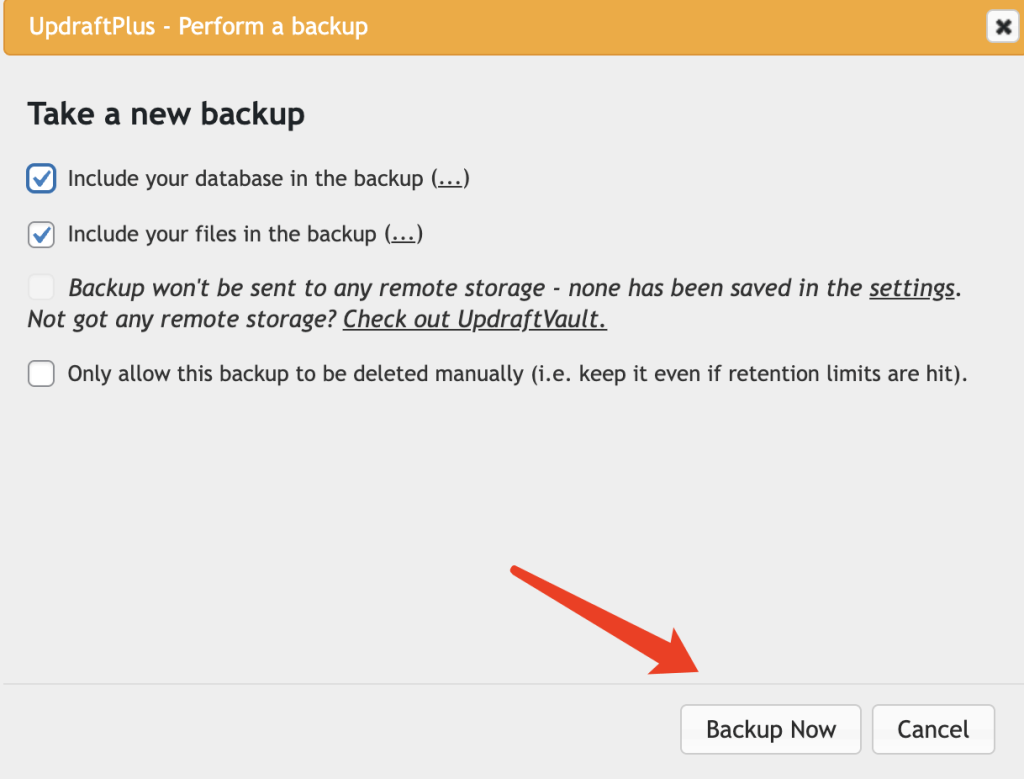
Here, you can select the items you want to back up. Just use the UpdraftPlus default settings to start backing up your website files and database.
After the backup is successful, you should see the backup record at the bottom of the same page. You will find that UpdraftPlus has divided the website data into databases, plugins, themes, etc.
These are all components of a WordPress website. You can click on each one to download it and save it on your local machine.

That’s it! Your WordPress site is now backed up. Easy, right?
UpdraftPlus Recovery Site
Now that you have learned how to use UpdraftPlus to back up your data, let’s take a look at how to restore your website.
The steps are simple. Select “Upload Backup File,” upload all the files backed up from UpdraftPlus, and then select “Restore.”

When your website encounters issues and requires restoration, simply click the “Restore” button next to the desired backup in the backup list, and your website will be restored to its previous state with a single click.
Method 2: WPvivid Backup + Restore Website
WPvivid is an emerging comprehensive WordPress backup, restore, and migration plugin. Almost all of its core features are free to use, which is rare.
In addition, its migration feature is excellent. I refer to it as “quick migration.” If you need to migrate, please refer to How to Migrate to a New Host.
Before starting the website backup, please install and activate the WPvivid plugin.
Use WPvivid to back up your website
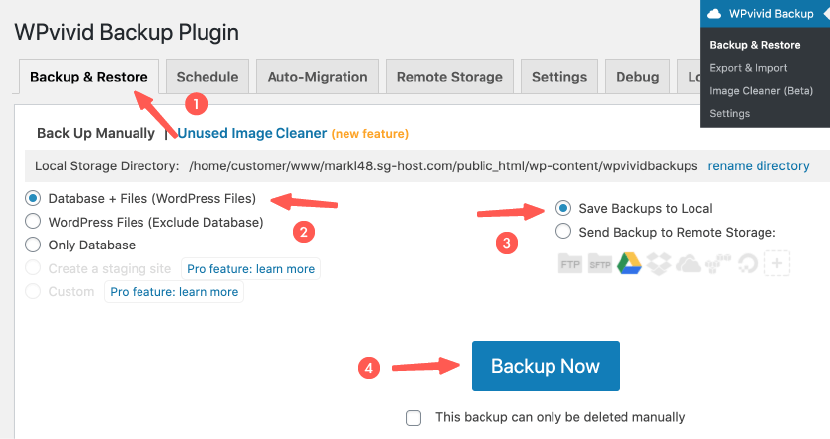
Go to Backup & Restore, select Database + Files to back up all WordPress files, then select Save Backups to Local, and finally click Backup Now to submit.
After the backup is complete, you will see the newly backed up record in the backup history list, which means that the backup has been successfully completed.
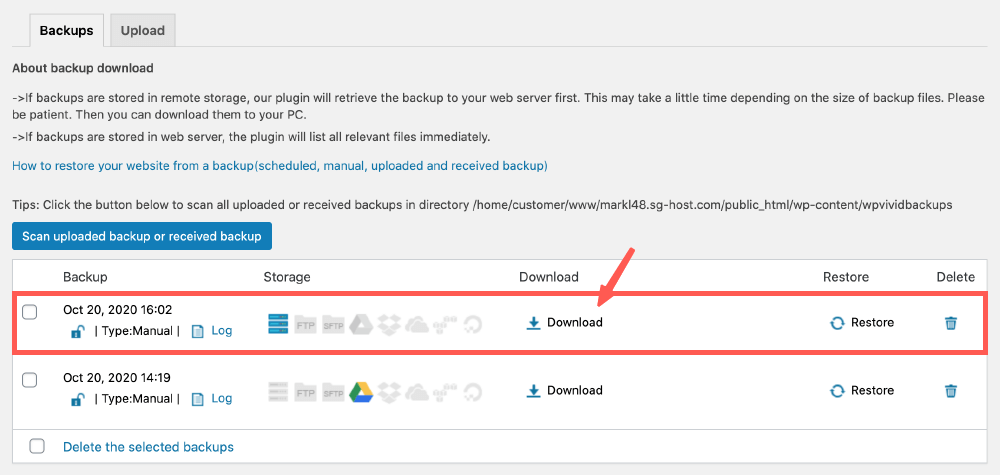
You can also click Download to download the backup file to your computer. It is safer to keep an extra copy of the file on hand.
WPvivid Restore Website
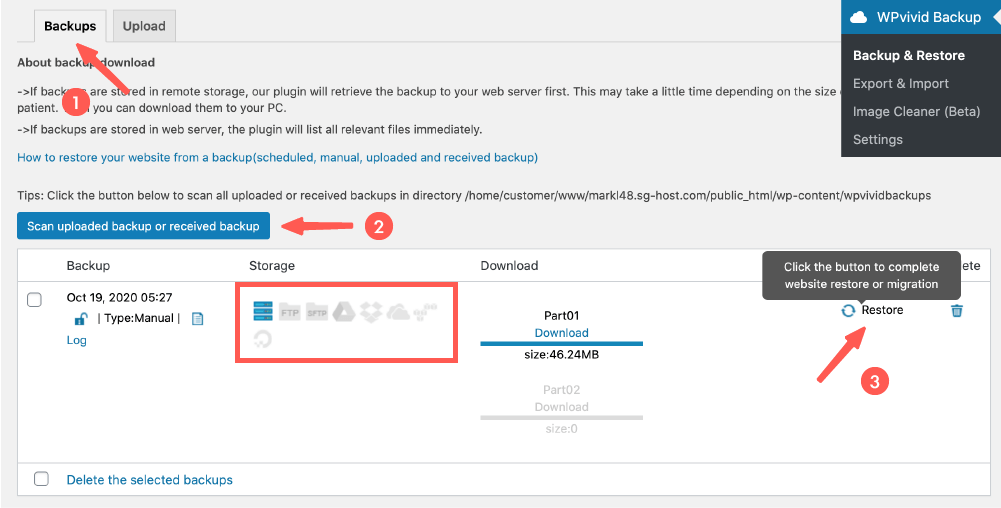
If your website files have been successfully backed up (locally or to cloud storage), go to WPvivid’s Backup & Restore, where you will see a list of historical backups.
If you don’t see it, click the rescan button in step 2 of the image below to re-read the backup files.
Finally, select the backup date you want to restore and click Restore to restore it.
WPvivid Another method of restoration is to manually upload and restore the website.
On the same page, switch to the Upload tab > Upload WPvivid backup file > Click Upload to start uploading.
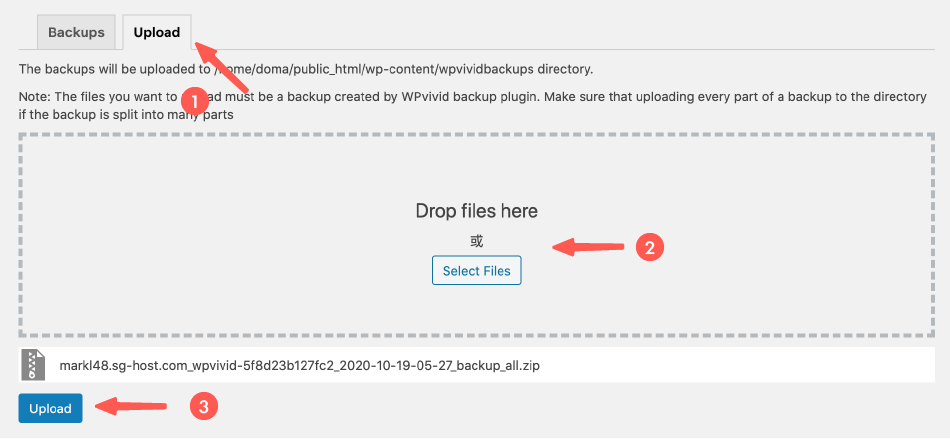
Once the backup files have been uploaded, they will appear in the list of available backups. Click Restore to restore them.
The time required to restore a website varies depending on the size of the website.

The above is a tutorial on the restore function of the WPvivid plugin. Follow the steps outlined above to successfully back up and restore your website.
Method 3: All-in-One Migration Backup + Restore Website
All-in-One Migration is a well-established website migration plugin that can also be used as a “WordPress backup and restore” feature.
Before starting the website backup, please install and activate the All-in-One Migration plugin.
Use All-in-One Migration to back up your website
Using All-in-One Migration to back up your website is intuitive. Go to the export page and select to back up using the file method.
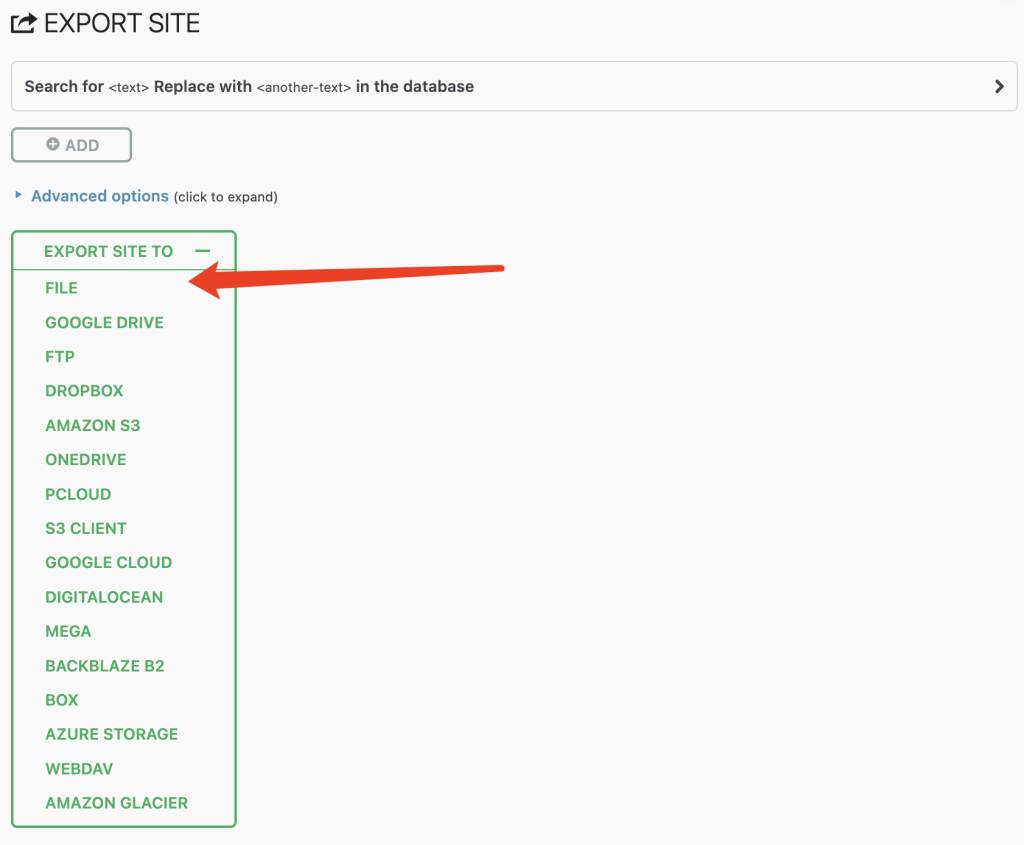
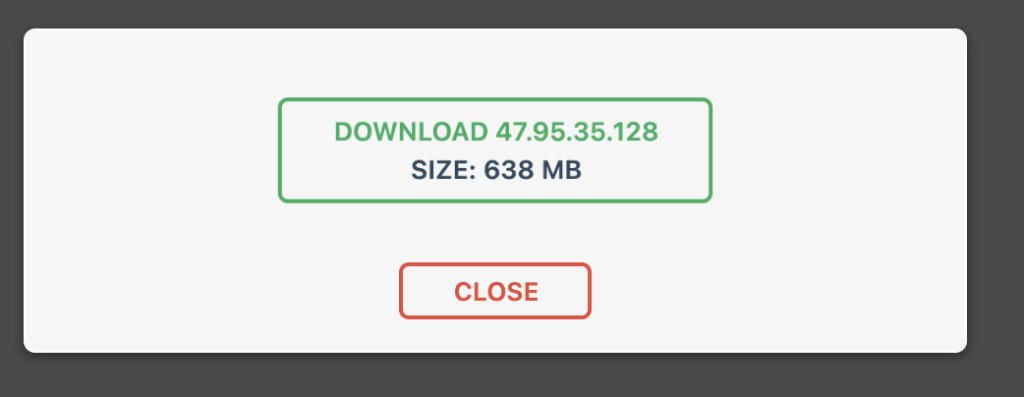
Wait for the website backup to complete (the time required varies depending on the size of the website), then click the button to download it to your computer.
Unfortunately, All-in-One Migration charges for almost all backup methods except for general file backup downloads.
This is why it is not considered the top choice for WordPress backup plugins, as this is not its strong point. However, it is very convenient for website migration.
All-in-One Migration Website Restoration
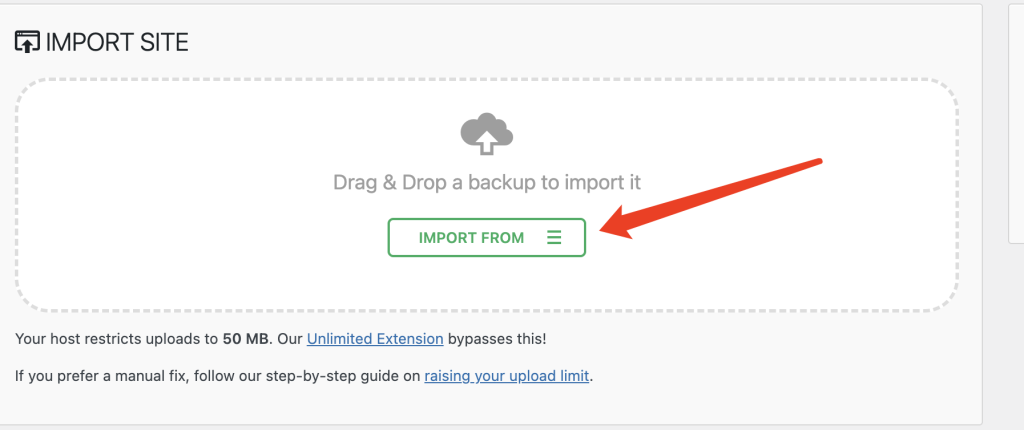
Go to the import page of All-in-One Migration and click Import From.
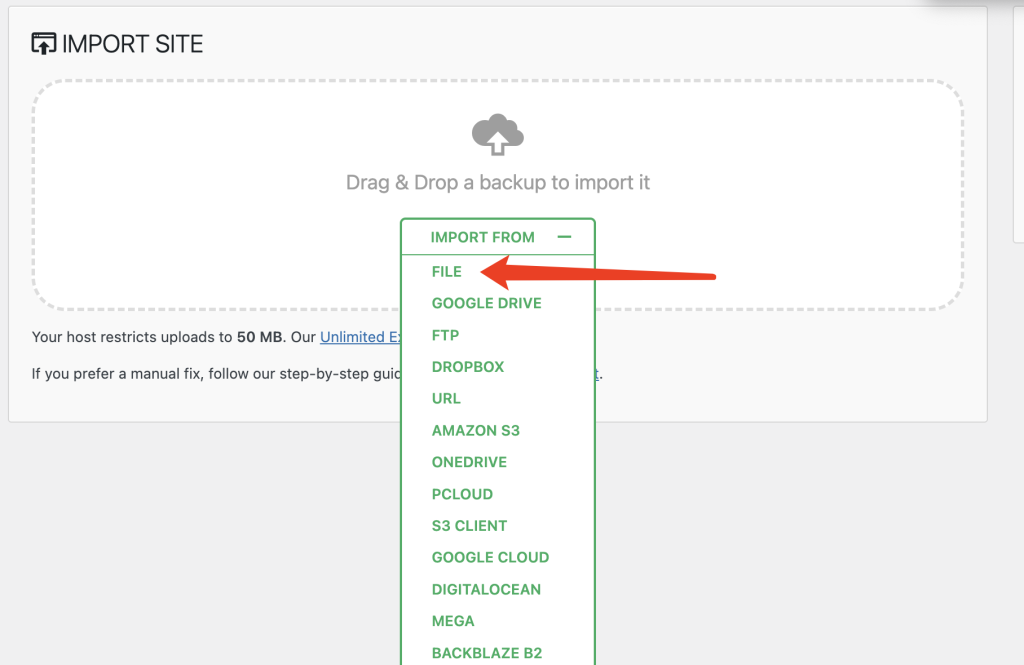
Select the import source, choose the file method, import the backup file created by All-in-One Migration, and then perform the upload.
The website restoration time will vary depending on the size of the website.
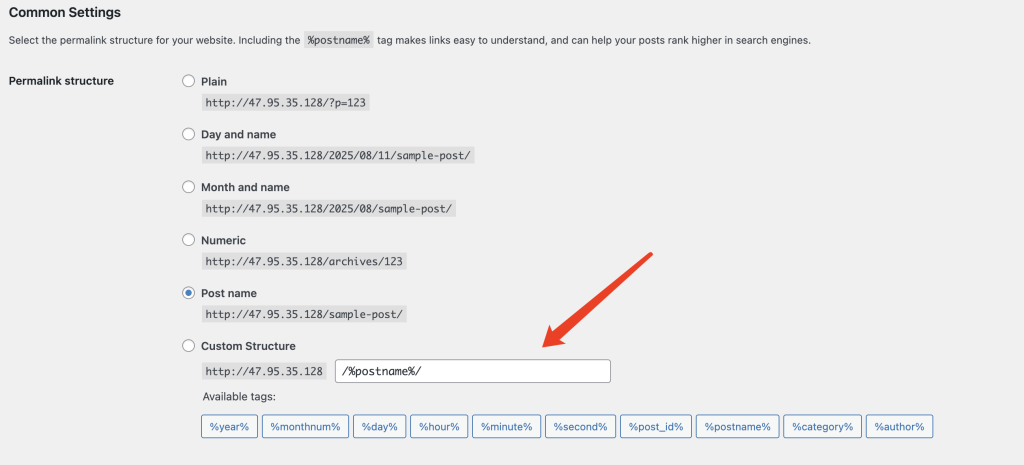
Go to WordPress Settings > Permalinks, select your previous link pattern (it may be different from mine), and save and submit.
Method 4: Use phpMyAdmin + FTP to back up and restore your website
In addition to using WordPress plugins to back up your website, you can also use phpMyAdmin + FTP to back up your website.
This is a more technical operation, but it can solve almost all problems and does not have the capacity limitations of some WordPress backup plugins.
When using this method to back up your website, there are two things you need to do, and both are essential, as follows.
- Use phpMyAdmin to back up the database.
- Use FTP software (we recommend FileZilla) to back up the website files.
1.Back up your website using phpMyAdmin + FTP
Back up the database using phpMyAdmin
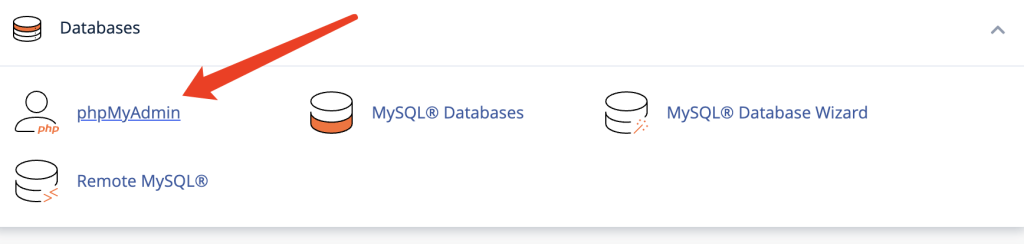
First, go to the cPanel homepage of any WordPress host and click on phpMyAdmin.
Select the export function, choose SQL as the format, confirm, and execute.
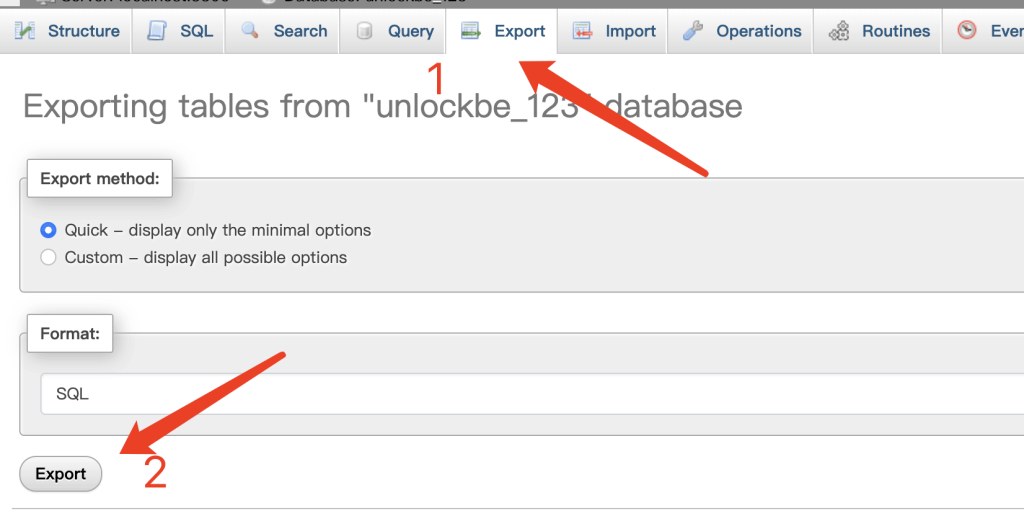
This will export the entire database of the website, generating files in SQL format, which is the typical format for database files.
Back up website files using FTP
There are many excellent FTP tools available for Mac and Windows. In this article, we will use FileZilla for demonstration purposes.
Step 1:Enter the FTP credentials (host, username, password) provided by your hosting service to connect to your WordPress website.

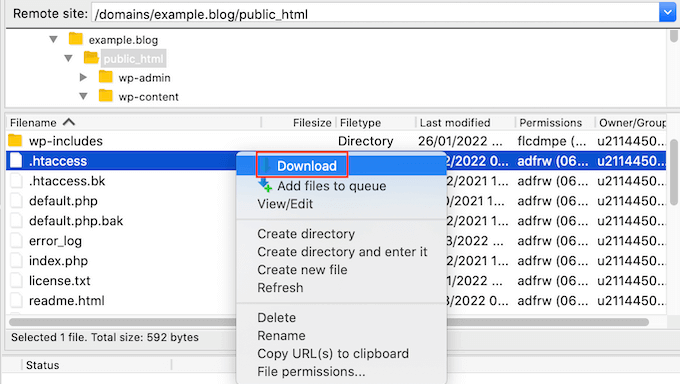
Step 2: Locate the folder where WordPress is installed (usually public_html).
Step 3: Download the public_html folder to your local computer.
Restore the website using phpMyAdmin + FTP
Restore the database using phpMyAdmin
Similar to the method used to export the database earlier. This time, click Import, upload the database data you backed up yourself, and then press Execute on the current page to start the import.
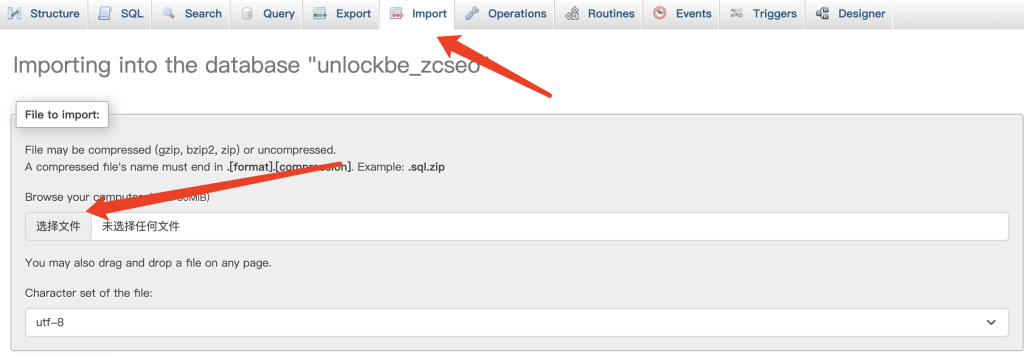
Once the import is complete, the system will prompt you, and the database restoration will be complete.
Restore website files using FTP
First, use an FTP tool to connect to the host where your website is located.
If the connection is successful, the FTP software interface should display the relevant website directories.
Once the directories have been successfully read, you need to delete the original website data on the current host before you can proceed with the restoration.
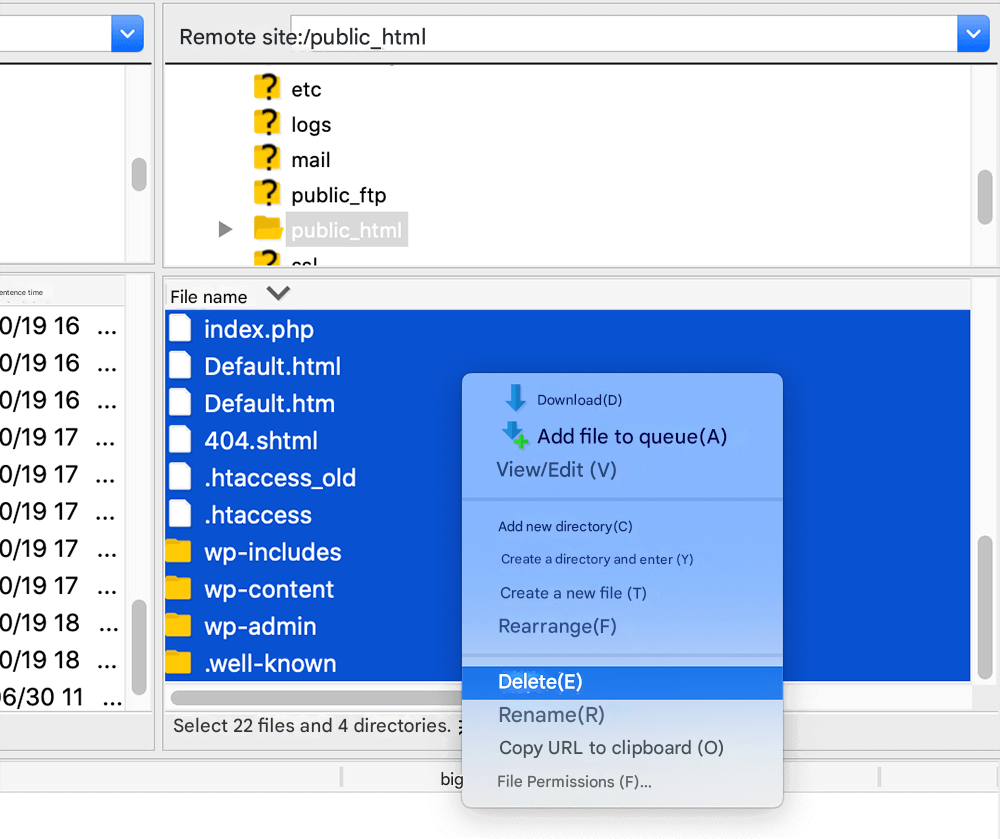
After deletion is complete, upload all of the original backup website files to this location.
The files must be uploaded to the root directory of the host (possibly /public_html), but the actual path varies depending on the host, so please follow your host’s instructions.

Wait for the website files to finish uploading, and once the website database has been restored, you can browse your URL to see if the restoration was successful. Visit the website pages and test whether functions such as forms are working properly.
Once your WordPress site has been successfully restored, please confirm that the WordPress settings > Permalink settings are the same as the original website settings so that it can function properly.
WordPress Backup FAQ
Q: How important is WordPress backup?
A: Creating a backup of your WordPress website allows you to restore it to its original state in the event of a hacker attack, data loss, or website crash. We strongly recommend that you regularly back up your website, as this is crucial for its security.
Q: Does WordPress save backups?
A: WordPress does not provide any backup services. You can manually back up your site using your hosting provider’s cPanel or FTP tools, or use WordPress plugins for backup (this is a simple method).
Q: How can I restore a WordPress site without a backup?
A: This is virtually impossible to restore. If you are concerned about losing your WordPress site’s configuration, data, or content, we recommend regularly backing up your site.
Summary
After reading this article, you should now understand how to back up and restore your WordPress website. For the security of your website, you should try to back up your WordPress website regularly, which is a very necessary practice.
